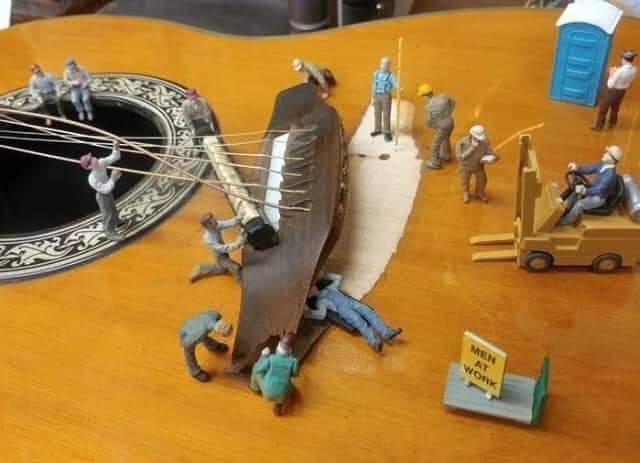
Ovation Celebrity CC28 for Repair
5 posters
Page 3 of 3
Page 3 of 3 •  1, 2, 3
 Re: Ovation Celebrity CC28 for Repair
Good luck - Fingers and toes are crossed for you 

challpa- Financial supporter
- Number of posts : 220
Registration date : 2008-05-30
 Re: Ovation Celebrity CC28 for Repair
You might want to coat the wire to the pickup and the positioning wood piece with wax or soap before gluing to prevent it from becoming a permanent part of the assembly due to squeeze-out. Melted wax from a candle works great for the wire and just rubbing a candle on the face of the wood block is adequate as a parting agent.

ExFender- Financial supporter
- Number of posts : 212
Age : 78
Location : Germany
Registration date : 2019-10-30
 Re: Ovation Celebrity CC28 for Repair
Cheers!challpa wrote:Good luck - Fingers and toes are crossed for you
It's been so long on this thing that I started losing my interest and momentum. When your head isn't in the game you tend to second guess everything you're doing and become less fearless.
Thanks Pete.ExFender wrote:You might want to coat the wire to the pickup and the positioning wood piece with wax or soap before gluing to prevent it from becoming a permanent part of the assembly due to squeeze-out. Melted wax from a candle works great for the wire and just rubbing a candle on the face of the wood block is adequate as a parting agent.
Yeah I was intending to do that but didn't mention it. Very important, especially with epoxy!
I was thinking of using floor wax but your candle suggestion (if I can find one) is a better idea for the wiring. I'm most concerned about that area since there is a good sized entry hole and I don't want it filling in and welding the wire in the process.
_________________
"A little song. A little dance. A little seltzer down your pants." -Chuckles the Clown

GUITARS : https://legend.barryeames.com
MUSIC/PIX/VIDEOS: https://getback.barryeames.com (including Spectrum ST)
 Epoxy time. It's Now or...never. Most likely For-ever!
Couldn't stand the anxiety any longer so I jumped in and did the deed!

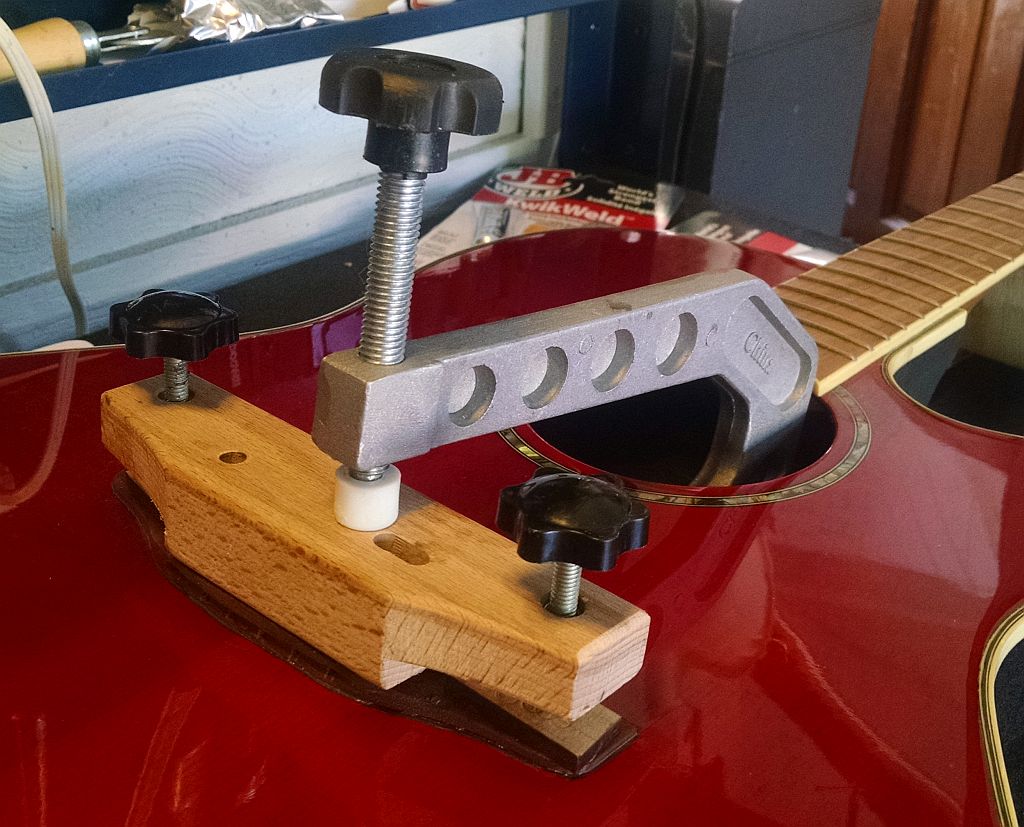
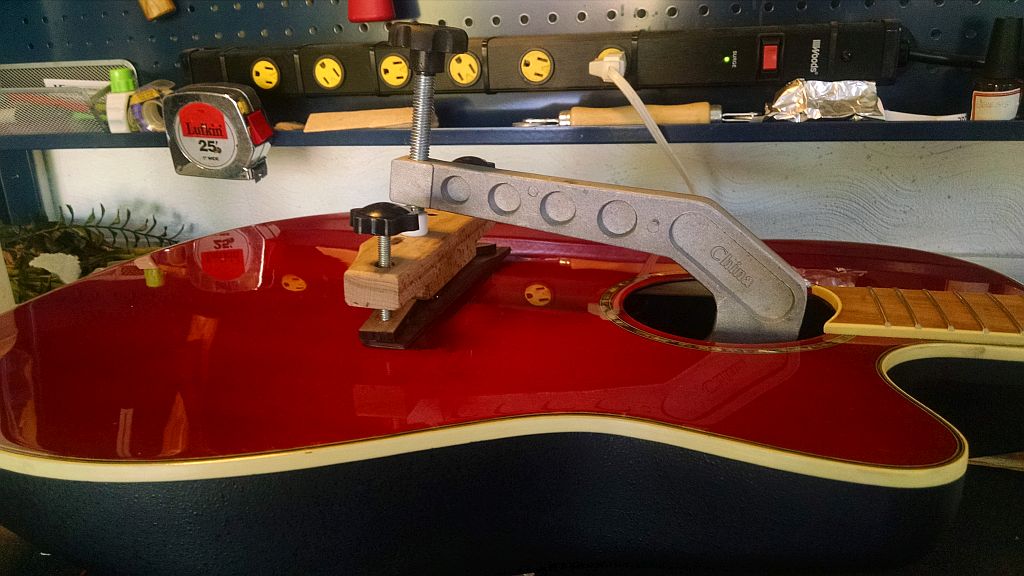

What a nerve racking experience! Epoxy has to be the worst sh!t to work with on a guitar, at least in this application.
Not at all what I was expecting.
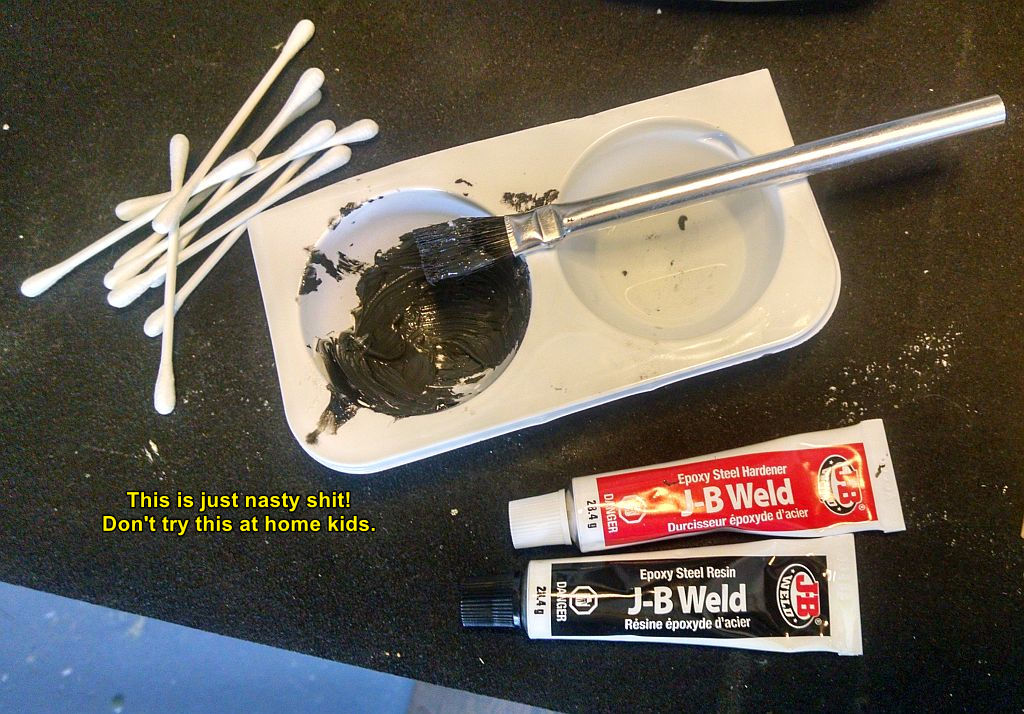
It is THICK and gooey to the extreme.
Won't spread worth a poop, even with a proper glue brush.
And I have a confession to make.
I chickened out of the 5-6 minute setup formula and went instead for the longer 4-6 hour set and cure time version.
And thank goodness I did!!
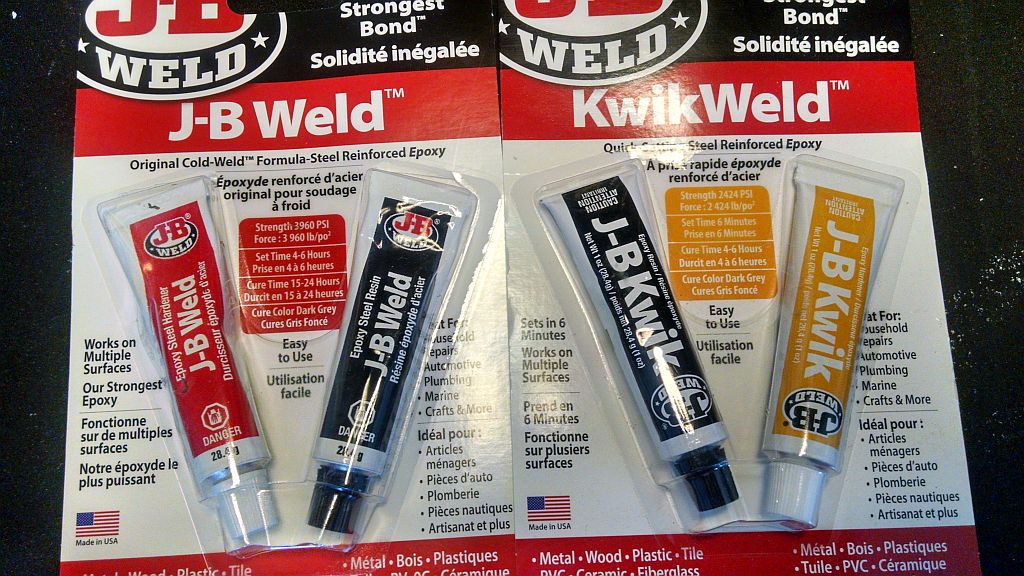
This guitar and bridge was non-standard enough to continually cause problems and to require a nonstandard approach to reattaching the bridge. NOTHING was straight forward!
I found myself shifting and repositioning the caul and constantly chasing the squeeze out for at least a good 20-30 minutes. If I had used the quick set formula I would have been dead in the water after 5 minutes!

I was able to mop up the worst of it with mineral spirits, Q-tips and shop towels. The only down side (so far) is that, as explained in an earlier post, I couldn't position the clamp on centre so some small areas around the perimeter did not receive even enough pressure. There may be some voids at least at the outer edge.
But with a tensile strength of almost 4,000 psi I think what is attached should do the deed! Gotta be an improvement over the original pathetic little squiggle of glue used by the factory!
Stay tuned. All shall be revealed in 24 hours.


What a nerve racking experience! Epoxy has to be the worst sh!t to work with on a guitar, at least in this application.
Not at all what I was expecting.

It is THICK and gooey to the extreme.
Won't spread worth a poop, even with a proper glue brush.
And I have a confession to make.
I chickened out of the 5-6 minute setup formula and went instead for the longer 4-6 hour set and cure time version.
And thank goodness I did!!

This guitar and bridge was non-standard enough to continually cause problems and to require a nonstandard approach to reattaching the bridge. NOTHING was straight forward!
I found myself shifting and repositioning the caul and constantly chasing the squeeze out for at least a good 20-30 minutes. If I had used the quick set formula I would have been dead in the water after 5 minutes!

I was able to mop up the worst of it with mineral spirits, Q-tips and shop towels. The only down side (so far) is that, as explained in an earlier post, I couldn't position the clamp on centre so some small areas around the perimeter did not receive even enough pressure. There may be some voids at least at the outer edge.
But with a tensile strength of almost 4,000 psi I think what is attached should do the deed! Gotta be an improvement over the original pathetic little squiggle of glue used by the factory!
Stay tuned. All shall be revealed in 24 hours.

_________________
"A little song. A little dance. A little seltzer down your pants." -Chuckles the Clown

GUITARS : https://legend.barryeames.com
MUSIC/PIX/VIDEOS: https://getback.barryeames.com (including Spectrum ST)
 Re: Ovation Celebrity CC28 for Repair
...awaiting with bated breath, chap!!

corsair- Senior Member
- Number of posts : 6330
Age : 65
Location : Mount Hunter, NSW, Australia
Registration date : 2008-04-08
 And now, the clean up!!
Well... one thing's for sure. It's well and truly stuck down now!
For better or worse it's on there and it ain't coming off short of using high explosives!
I took the clamp off last night and started some preliminary cleanup, scraping with a small Exacto knife and straight razor blades:

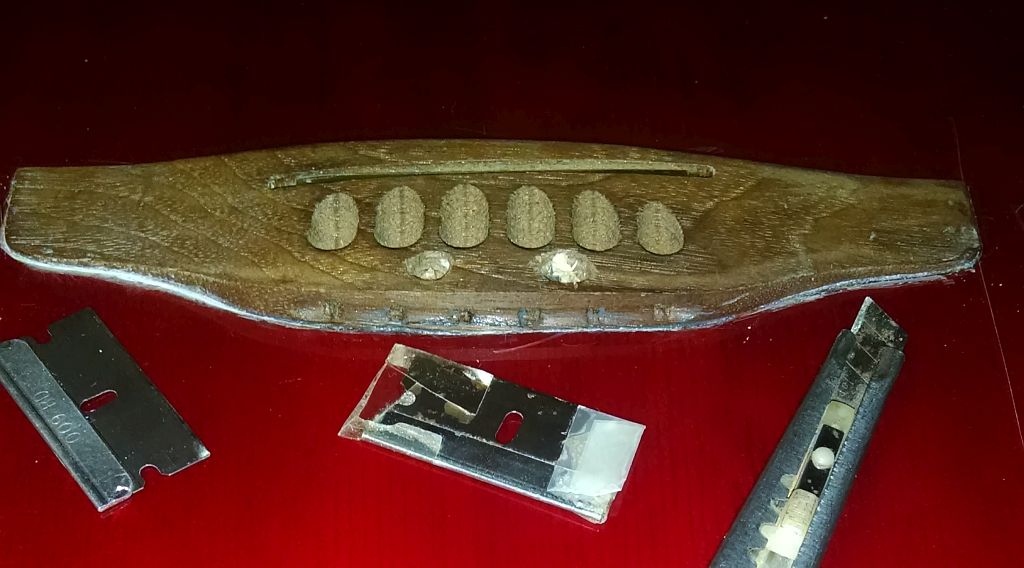
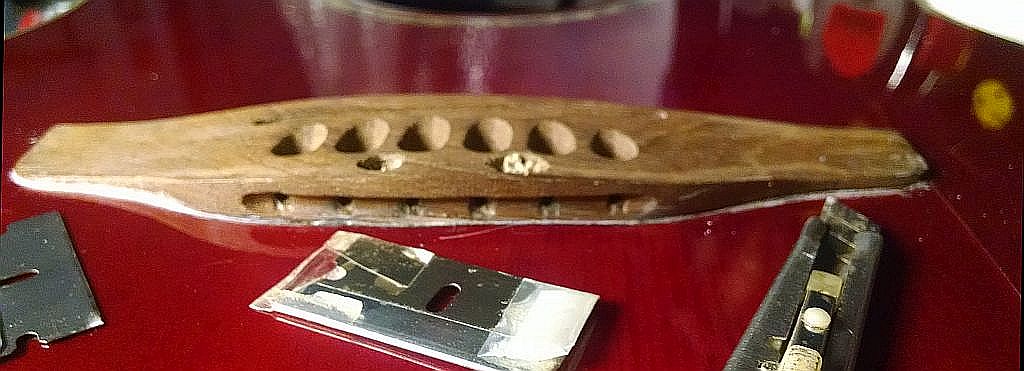
Despite constant attention to the squeeze-out that I could see and reach, there was still enough missed that needs removal or trimming. The epoxy dried to a dark grey colour which was difficult to spot in some areas. The white-ish colour you see is actually the scraped surface of the glue. I'm not finished. Still more to do.
You can see some of the grey epoxy on the edge in this shot. This is what I have been removing from the guitar surface in the above pix.

The little location dowels I used are also now stuck in the holes.
Not a big problem really, just a nuisance to re-drill the one hole needed for the bridge doctor attachment.
The other one I'll cap with something.

You'll notice there is a space along the edge.
It looks worse than it is. It's actually only about 1.5-2 mm deep, one of those spots that couldn't be clamped well enough. Most of the pressure was on the rear of the bridge.
Folks, while I'm no longer worried about the bridge lifting or rotating once the BD is in place, I'm less than confident at this point that the high action will have been improved much.
Given that I was not able to remove much of the the surface finish under the bridge and I couldn't do much beyond leveling some of the old epoxy, the bonding surface was less than ideal. And despite some success trying to flatten the belly bulge there's still enough of it there to give cause for concern.
If the action remains high I'm pretty much out of options except to make it into a slide guitar.
For better or worse it's on there and it ain't coming off short of using high explosives!

I took the clamp off last night and started some preliminary cleanup, scraping with a small Exacto knife and straight razor blades:


Despite constant attention to the squeeze-out that I could see and reach, there was still enough missed that needs removal or trimming. The epoxy dried to a dark grey colour which was difficult to spot in some areas. The white-ish colour you see is actually the scraped surface of the glue. I'm not finished. Still more to do.
You can see some of the grey epoxy on the edge in this shot. This is what I have been removing from the guitar surface in the above pix.

The little location dowels I used are also now stuck in the holes.
Not a big problem really, just a nuisance to re-drill the one hole needed for the bridge doctor attachment.
The other one I'll cap with something.

You'll notice there is a space along the edge.
It looks worse than it is. It's actually only about 1.5-2 mm deep, one of those spots that couldn't be clamped well enough. Most of the pressure was on the rear of the bridge.
Folks, while I'm no longer worried about the bridge lifting or rotating once the BD is in place, I'm less than confident at this point that the high action will have been improved much.
Given that I was not able to remove much of the the surface finish under the bridge and I couldn't do much beyond leveling some of the old epoxy, the bonding surface was less than ideal. And despite some success trying to flatten the belly bulge there's still enough of it there to give cause for concern.
If the action remains high I'm pretty much out of options except to make it into a slide guitar.
_________________
"A little song. A little dance. A little seltzer down your pants." -Chuckles the Clown

GUITARS : https://legend.barryeames.com
MUSIC/PIX/VIDEOS: https://getback.barryeames.com (including Spectrum ST)
 Re: Ovation Celebrity CC28 for Repair
If the action is only slightly too high, is shaving a little off the saddle an option?

corsair- Senior Member
- Number of posts : 6330
Age : 65
Location : Mount Hunter, NSW, Australia
Registration date : 2008-04-08
 Re: Ovation Celebrity CC28 for Repair
That might be problematic.
The top of course is radiused and compensated so not a good idea touching it.
But the bottom, where you'd normally trim a saddle is not solid.
Rather, it's notched to match the string spacing. The idea is that it's supposed to isolate string's vibration and make the sound cleaner.
No idea if it makes a difference or not but it's part of the pickup's design. There isn't a lot there to reduce, so if I need to come down there's not much adjustment to be had.
Um, then of course I'm close to having next to no break angle!
_________________
"A little song. A little dance. A little seltzer down your pants." -Chuckles the Clown

GUITARS : https://legend.barryeames.com
MUSIC/PIX/VIDEOS: https://getback.barryeames.com (including Spectrum ST)
 "Ruby" is Finished! ...sort of
The GOOD news
The bridge is solid and holding nicely!

I just quickly threw on the old worn bronze strings that came with it to check it out.
Nothing has been cleaned or finalized cosmetically.
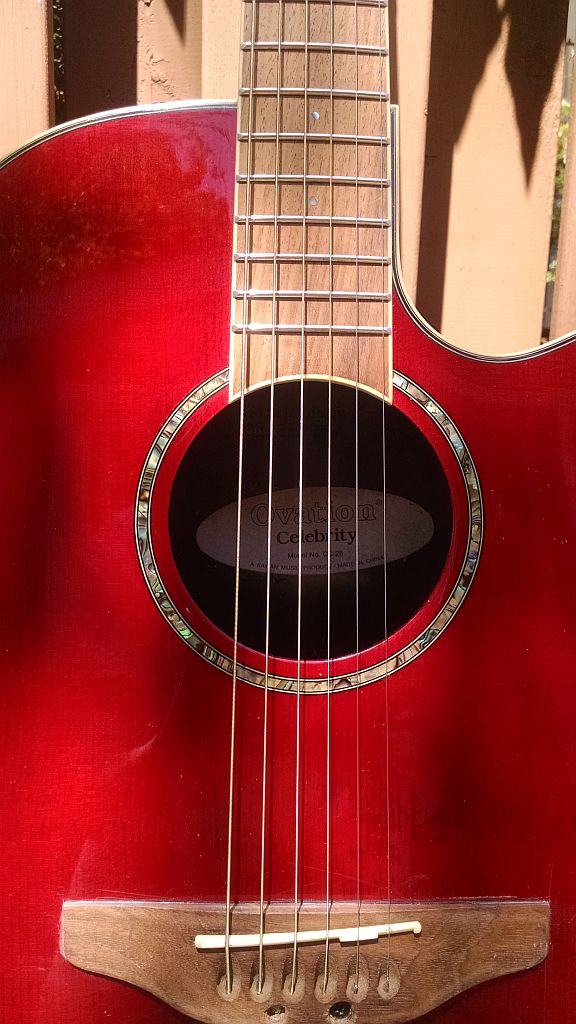
My little "bridge doctor" is installed and seems to be stabilizing things OK.
Before going further, let me just say, the sound out of this little guitar is remarkable! Deep resonant bass and clear highs! I was startled by the output acoustically, and even more impressed after putting it through my PA. Completely unexpected, and I own 2 Ovations already!
So far. All good.
And now the BAD
As feared, the original belly hump is still there.
Perhaps a little less severe, but still sufficient to cause the high action to persist.

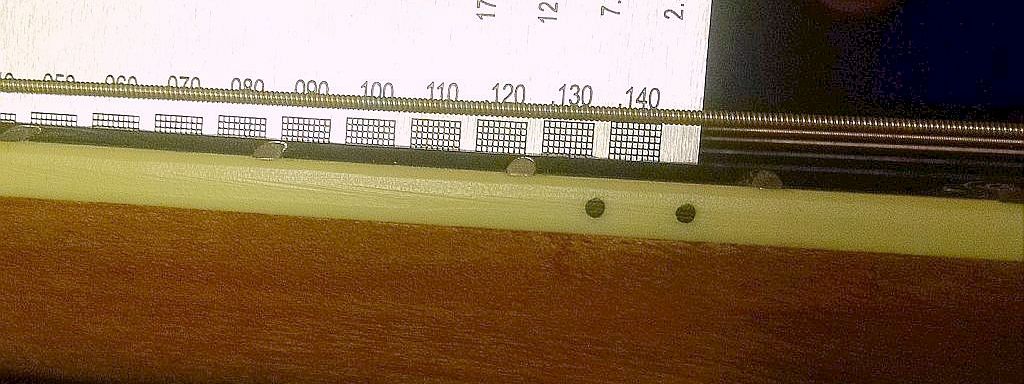
I reduced the saddle's end notches which dropped the strings a very small amount but that's as far as I can take it. Sanding off any more will bugger up the contact points on the pickup as well as losing the break angle into the bridge.
As you see in the picture the action is around .140" at the 12th!
To reduce it to something acceptable like .080" or even .100" (a difference of .040" to .060") that corresponds to dropping the saddle by .080" to .120". But there just isn't anything there to reduce!
I'm now firmly in neck reset territory!!

There is a weird and wild method to "reset" these Celebrity necks (which are also plastic by the way!) But that's a discussion for another time.
Playability
It takes some getting used to the small width neck but you adjust after a bit. Playing above the 5th fret is a challenge and not easy, so ultimately I dropped the tuning a full step and it was much better. I think these are 10's on the guitar I haven't checked but it feels like 10's.I have new set of 10's to put on when I'm ready. No point going heavier.
All said, I'm happy to at least see this thing working again. Far from perfect but playable now. And 'Ruby' is a nice looking little thing.
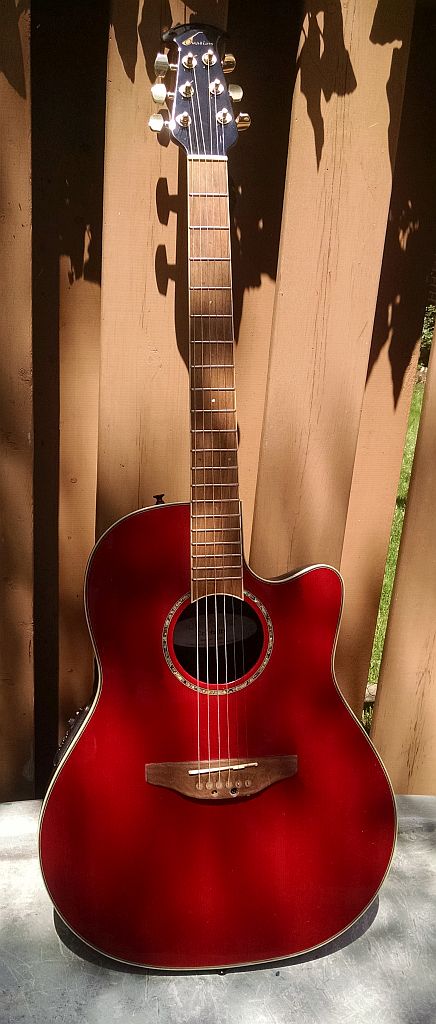
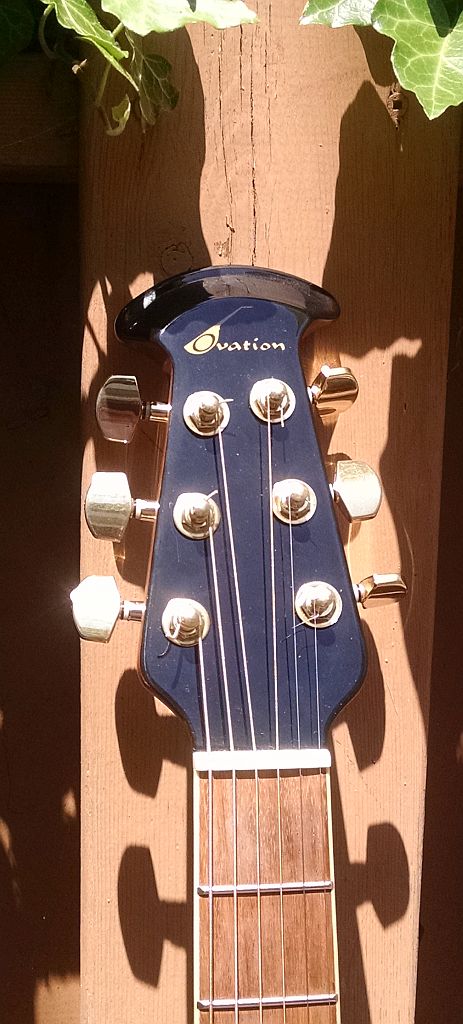
* sigh *
_________________
"A little song. A little dance. A little seltzer down your pants." -Chuckles the Clown

GUITARS : https://legend.barryeames.com
MUSIC/PIX/VIDEOS: https://getback.barryeames.com (including Spectrum ST)
 Re: Ovation Celebrity CC28 for Repair
Nice!! Been a bit of an epic, this one, hasn't it!!? Interesting to follow, too!
Action will be interesting to dick about with....
Carry on.
Action will be interesting to dick about with....
Carry on.

corsair- Senior Member
- Number of posts : 6330
Age : 65
Location : Mount Hunter, NSW, Australia
Registration date : 2008-04-08
 Re: Ovation Celebrity CC28 for Repair
This started out as a February winter project as a diversion from the crap weather.
I had no idea that I'd still be working on it and writing about it in JUNE! With the air conditioning on! Epic indeed!
Notwithstanding my above comments, I'm still mulling over reducing the saddle height. The notches on the bottom that I referred to allow for individual "tuning" of each string. Bit of a luxury touch on such a cheap guitar and probably not really needed?
GraphTech refers to their Tusq version as Microbalance and at about $24 it ain't cheap. And of course it requires considerable sizing to fit. Trying to find a genuine Ovation replacement is next to impossible.
Despite it all, the guitar does sound amazingly good even with old strings and poor action. *
On it goes...
* addendum edit:
It eventually dawned on me that I've been so fixated on the hump, bridge and saddle that I completely forgot that one of the nice side effects of the bridge doctor is a volume boost! That block of wood under the bridge has added a lot of mass and energy, and the dowel/ball end is transmitting the vibration to the bowl for amplification. Working very nicely too!
_________________
"A little song. A little dance. A little seltzer down your pants." -Chuckles the Clown

GUITARS : https://legend.barryeames.com
MUSIC/PIX/VIDEOS: https://getback.barryeames.com (including Spectrum ST)

challpa- Financial supporter
- Number of posts : 220
Age : 58
Location : Brisbane Queensland Australia
Registration date : 2008-05-30
 Re: Ovation Celebrity CC28 for Repair
That's very, very funny!!

corsair- Senior Member
- Number of posts : 6330
Age : 65
Location : Mount Hunter, NSW, Australia
Registration date : 2008-04-08
 Re: Ovation Celebrity CC28 for Repair

I can laugh...now.
That's very clever!
_________________
"A little song. A little dance. A little seltzer down your pants." -Chuckles the Clown

GUITARS : https://legend.barryeames.com
MUSIC/PIX/VIDEOS: https://getback.barryeames.com (including Spectrum ST)
Page 3 of 3 •  1, 2, 3
 Similar topics
» Ovation Celebrity CC28 for Repair REDUX
» X390 Caspian Blue @ Guitar Center Cedar Rapids
» Fretboard repair
» For spares or repair
» ... and so it begins!!
» X390 Caspian Blue @ Guitar Center Cedar Rapids
» Fretboard repair
» For spares or repair
» ... and so it begins!!
Page 3 of 3
Permissions in this forum:
You cannot reply to topics in this forum|
|
|

 Website
 Facebook