
 Website
 Facebook
...and the Genesis I that became a project as well.

...and the Genesis I that became a project as well.
![]() by Iceman Tue Apr 26, 2011 7:22 pm
by Iceman Tue Apr 26, 2011 7:22 pm
Seeing as spares is now closed can this chromed piece be found anywhere or am I left to fashion one of these as well? Really an ingenious little design to be sure. Anyone run into this before? I'm thinking that a heli-coil could be a workable shortcut in the meantime as well.

Wiring diagram will be next as the humbucker only works in the "out" position, but at least I knew that one going in.
Last edited by Iceman on Wed Apr 27, 2011 10:00 pm; edited 1 time in total

Iceman- Hero, Legend, and all round good guy
- Number of posts : 2894
Age : 61
Location : Up North
Registration date : 2011-02-22 -

Re: ...and the Genesis I that became a project as well.
![]() by corsair Wed Apr 27, 2011 2:24 am
by corsair Wed Apr 27, 2011 2:24 am
http://forum.westoneguitars.net/t464-repairing-lock-nuts
... which reminds me; Steve are you going to post some pictures of this for us??
I've made a whole heap of the little shims as they are indeed quite easy to make and I find making things like that therapeutic!!

corsair- Senior Member
- Number of posts : 6342
Age : 65
Location : Mount Hunter, NSW, Australia
Registration date : 2008-04-08
Re: ...and the Genesis I that became a project as well.
![]() by Iceman Wed Apr 27, 2011 7:27 am
by Iceman Wed Apr 27, 2011 7:27 am
One other option is that the same seller has an xa1330 he was unsuccessful in selling on evilbay and is looking to part it out now instead. My question would be how much of that model can be used for parts on an xa1530? I'm leaning towards offering to buy it whole just to save it from the cannibals anyway. He has already offered to send me the nut plate from that one as a replacement. His starting bid on the xa1330 was $187 w/$249 BIN, so what's a fair offer on one of these? Normal dings, no whammy, no hsc, missing all stringlock hardware but the back plate.
Iceman- Hero, Legend, and all round good guy
- Number of posts : 2894
Age : 61
Location : Up North
Registration date : 2011-02-22 -
re: stringlock screw length
![]() by IanO Wed Apr 27, 2011 7:46 am
by IanO Wed Apr 27, 2011 7:46 am
IanO- Senior Member
- Number of posts : 259
Location : Cambridge U.K.
Registration date : 2011-02-04
Re: ...and the Genesis I that became a project as well.
![]() by Iceman Wed Apr 27, 2011 7:53 am
by Iceman Wed Apr 27, 2011 7:53 am
Iceman- Hero, Legend, and all round good guy
- Number of posts : 2894
Age : 61
Location : Up North
Registration date : 2011-02-22 -
Re: ...and the Genesis I that became a project as well.
![]() by corsair Wed Apr 27, 2011 8:40 am
by corsair Wed Apr 27, 2011 8:40 am
Iceman wrote:Thanks John for the link.
No worries...
One other option is that the same seller has an xa1330 he was unsuccessful in selling on evilbay and is looking to part it out now instead. My question would be how much of that model can be used for parts on an xa1530? I'm leaning towards offering to buy it whole just to save it from the cannibals anyway. He has already offered to send me the nut plate from that one as a replacement. His starting bid on the xa1330 was $187 w/$249 BIN, so what's a fair offer on one of these? Normal dings, no whammy, no hsc, missing all stringlock hardware but the back plate.
Sounds a little high for essentially a stripped put guitar.... If it has Bendmaster Deluxe gear onboard - which it does according to the catalogue - then you're golden but I would suspect that the locking base is stripped out if the rest of the gear is gone... if it's in reasonable nick apart from the missing bits, then offer him a reasonably lowball figure and go from there...
corsair- Senior Member
- Number of posts : 6342
Age : 65
Location : Mount Hunter, NSW, Australia
Registration date : 2008-04-08
Re: ...and the Genesis I that became a project as well.
![]() by Steve777 Wed Apr 27, 2011 7:12 pm
by Steve777 Wed Apr 27, 2011 7:12 pm
Just make sure that you use three different length bolts if you want to use all of the threads in the holes. Considering the A/E bolt needs to be torqued down somewhat more than the other two, it seems madness to use such a shallow bolt. At least change that one for a longer length to reduce the risk of stripping in the future as this one is usually the first to go.
I'll see what I can do about pics but as the string lock is on the guitar ......
Steve777- Senior Member
- Number of posts : 356
Age : 67
Location : Coventry, UK
Registration date : 2008-10-14
Re: ...and the Genesis I that became a project as well.
![]() by Iceman Wed Apr 27, 2011 9:59 pm
by Iceman Wed Apr 27, 2011 9:59 pm
These 1 mm shims serve what purpose exactly? I am going on the assumption they are wear & tear items designed to be replaced as grooves develop, or do I have that wrong? I'm of a mind to test doing away with them and just milling channels for the strings to lie in, hoping to improve the grip by increasing the surface area each string would be in contact with.
Ideas? Thoughts anyone?
Oh..... my seller is intent on parting out the xa1330 he has. Said he had $150 into it and feels he can do better than $200 with it in pieces. He is sending the plate off that one to me and it has no stripped threads so that's that.
I will be repairing the current one with helicoils tomorrow and most likely will do all 3 bolt holes. The helicoils themselves are chrome coated spring steel so a strip out will become quite difficult in the future. Absolutely FABULOUS neck and playability on this Genesis, had quite the tussle getting my wife's hands off it.
Iceman- Hero, Legend, and all round good guy
- Number of posts : 2894
Age : 61
Location : Up North
Registration date : 2011-02-22 -
Re: ...and the Genesis I that became a project as well.
![]() by corsair Thu Apr 28, 2011 2:00 am
by corsair Thu Apr 28, 2011 2:00 am
Iceman wrote:These 1 mm shims serve what purpose exactly?
I don't really know why the design opted for those rather than a flat milled base other than the fact that the base is alloy and torquing down the strings into soft alloy is soon gonna wear huge channels into it, hence the steel shims....
Absolutely FABULOUS neck and playability on this Genesis,
Ain't it, though?! Wide, flat and fast, fast, fast...
Thorn made some lock bases a while ago which were resin with a steel insert where the bolts go; they worked very well indeed; lets have a look at the process you're going through to machine them, man - I love this sort of stuff!!
corsair- Senior Member
- Number of posts : 6342
Age : 65
Location : Mount Hunter, NSW, Australia
Registration date : 2008-04-08
Re: ...and the Genesis I that became a project as well.
![]() by Iceman Thu Apr 28, 2011 7:47 am
by Iceman Thu Apr 28, 2011 7:47 am
Meantime I am also getting ready to look onto the push/pull knob for the humbucker. Currently it only works in the pull position. Did not see a diagram on our copy of Thorn's archives. Anyone know if one of the other wiring schematics will suffice?
Iceman- Hero, Legend, and all round good guy
- Number of posts : 2894
Age : 61
Location : Up North
Registration date : 2011-02-22 -
Re: ...and the Genesis I that became a project as well.
![]() by Iceman Tue May 03, 2011 10:05 pm
by Iceman Tue May 03, 2011 10:05 pm
Iceman- Hero, Legend, and all round good guy
- Number of posts : 2894
Age : 61
Location : Up North
Registration date : 2011-02-22 -
Re: ...and the Genesis I that became a project as well.
![]() by Westbone Wed May 04, 2011 2:17 pm
by Westbone Wed May 04, 2011 2:17 pm
Have you tried cleaning out the switch?

Westbone- Financial supporter
- Number of posts : 5918
Location : Redbridge
Registration date : 2008-12-28 -
Re: ...and the Genesis I that became a project as well.
![]() by Steve777 Wed May 04, 2011 3:39 pm
by Steve777 Wed May 04, 2011 3:39 pm
As the SC's are quite powerful in their own right, be careful you don't get a big volume drop when you go to coil tap.
Steve777- Senior Member
- Number of posts : 356
Age : 67
Location : Coventry, UK
Registration date : 2008-10-14
Re: ...and the Genesis I that became a project as well.
![]() by Iceman Fri May 06, 2011 5:10 pm
by Iceman Fri May 06, 2011 5:10 pm
Iceman- Hero, Legend, and all round good guy
- Number of posts : 2894
Age : 61
Location : Up North
Registration date : 2011-02-22 -
Re: ...and the Genesis I that became a project as well.
![]() by Westbone Fri May 06, 2011 10:47 pm
by Westbone Fri May 06, 2011 10:47 pm
In which case it is no problem whatsoever
Westbone- Financial supporter
- Number of posts : 5918
Location : Redbridge
Registration date : 2008-12-28 -
Re: ...and the Genesis I that became a project as well.
![]() by Iceman Sat May 07, 2011 12:02 am
by Iceman Sat May 07, 2011 12:02 am
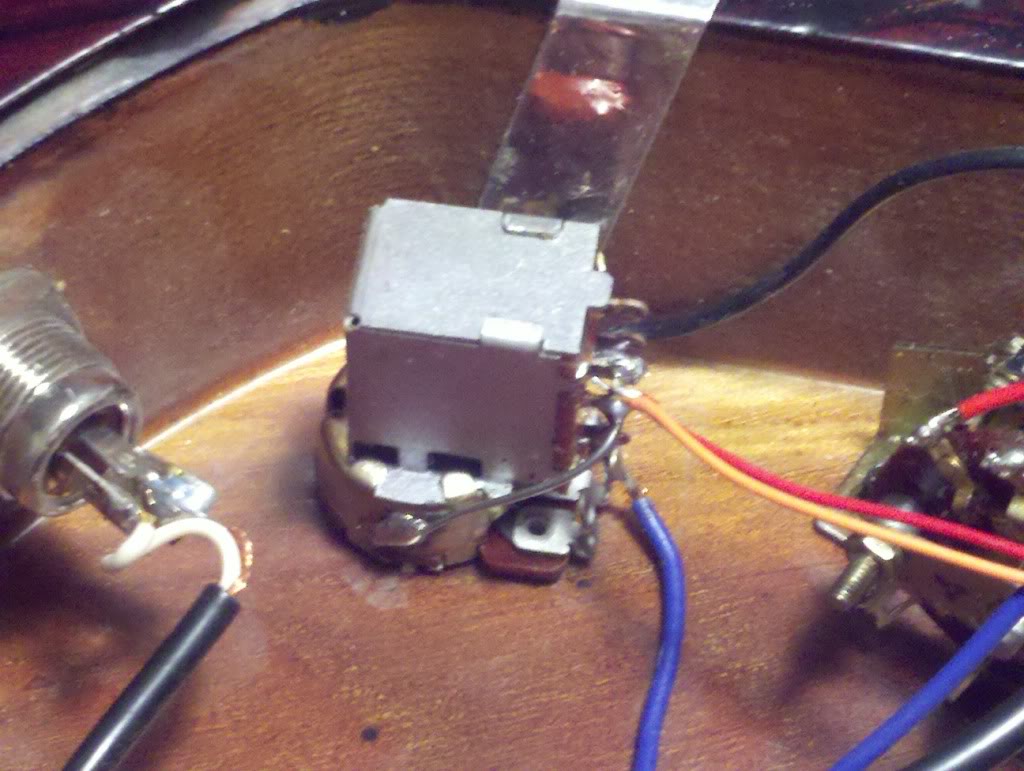
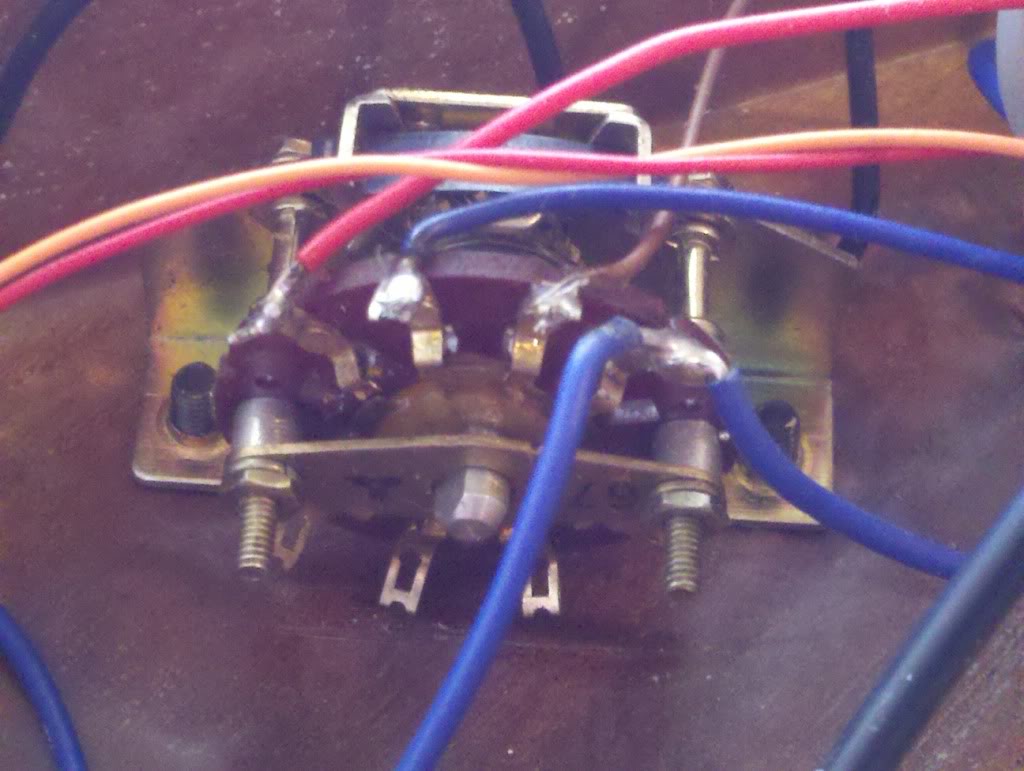
The red and orange wires lead to the humbucker itself and the blue wire to the 5-way switch. My concern is with the red and orange wires being soldered both to the same post on the switch. Currently the humbucker only works in the out position. Is it possible each wire needs to be on their own post?
Couldn't see a wiring diagram for an x300 on the archive WB, are you meaning to say my wife's x390 would be similar enough for a direct comparison?
Iceman- Hero, Legend, and all round good guy
- Number of posts : 2894
Age : 61
Location : Up North
Registration date : 2011-02-22 -
Re: ...and the Genesis I that became a project as well.
![]() by Westbone Sat May 07, 2011 2:08 am
by Westbone Sat May 07, 2011 2:08 am
Take a shot looking directly at the connections, it's hard to see from the side.
Westbone- Financial supporter
- Number of posts : 5918
Location : Redbridge
Registration date : 2008-12-28 -
Re: ...and the Genesis I that became a project as well.
![]() by Iceman Sat May 07, 2011 9:24 am
by Iceman Sat May 07, 2011 9:24 am
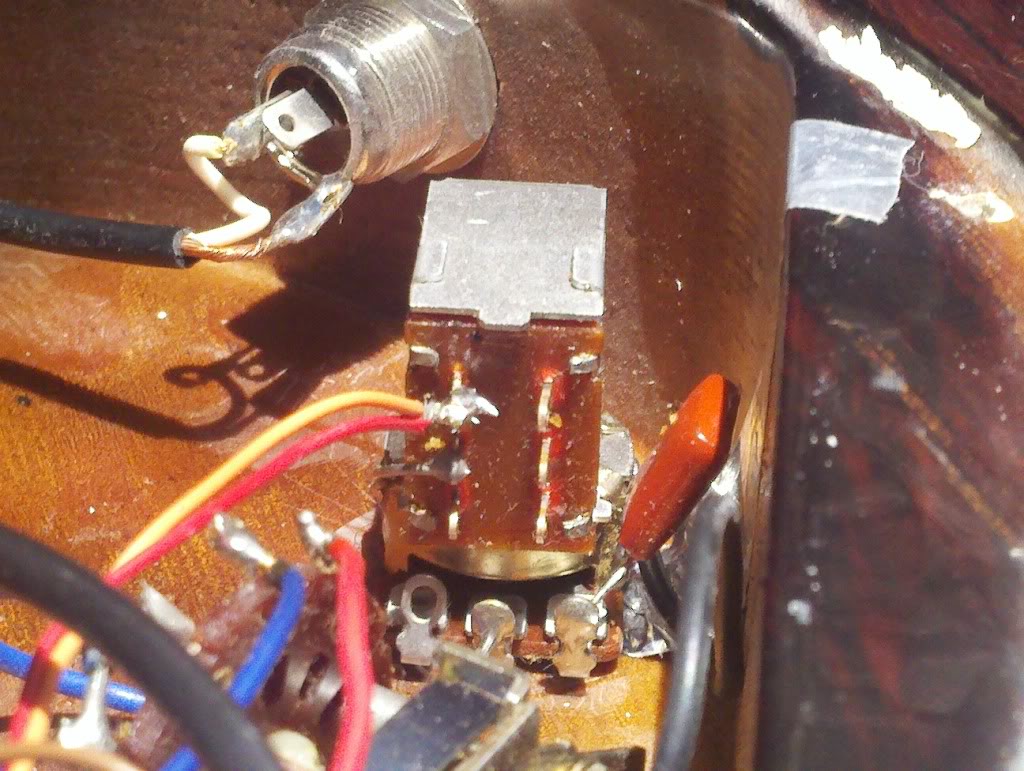
6 connection posts arranged 3x3 (vertically) and 3 connection posts at the lower base of the switch fanned horizontally. The upper left post has RED & ORANGE wires that join a shared shielded gang wire to the pickups. Next post below that a BARE wire that ends soldered to the lower base of the switch. No other wires on the other 4 posts.
The horizontal posts on the lower base have a BLUE wire on the center post that leads to the 5-way selector and a CAPACITOR?? on the outside post that the other end is soldered to the lower base and the BLACK wire you see is also runs from that same solder point to the housing side of the 5-way selector. I think you are correct WB in thinking that is the earth wire then.
Shot the switch itself with contact cleaner so unless half the switch is dead I'm at a loss for what is going on as I do not know the original wiring sequence.
Thanks for the assist.
Iceman- Hero, Legend, and all round good guy
- Number of posts : 2894
Age : 61
Location : Up North
Registration date : 2011-02-22 -
Re: ...and the Genesis I that became a project as well.
![]() by Westbone Sat May 07, 2011 10:25 am
by Westbone Sat May 07, 2011 10:25 am
Is the orange coming from the same p/up?
If so that should go to the 5 way switch
Post a pic. of the 5 way.
Westbone- Financial supporter
- Number of posts : 5918
Location : Redbridge
Registration date : 2008-12-28 -
Re: ...and the Genesis I that became a project as well.
![]() by Iceman Sat May 07, 2011 3:11 pm
by Iceman Sat May 07, 2011 3:11 pm
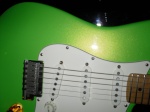
8 connection posts arranged radially, 4 top and 4 bottom. Far upper left is RED to neck SC, mid upper left is DARK BLUE to middle SC, mid upper right BROWN to bridge HB, far upper right BLUE from base of push/pull switch and joined at 5-way going to one of 3 connection posts at the base of the volume control.
So the humbucker has 4 wires from it going to the controls as follows...
RED/ORANGE to one connection post on the push/pull
BROWN to the 5-way as described above
BLACK wire to the back surface of the volume control. This is another earth wire, maybe??
Whilst experimenting with the 5-way and what it routes where I did find out that the push/pull does in fact work, TO A DEGREE. It is active in the push position but only generates a small amount of sound and only if the tone is turned towards the bright setting. You can hear a return from about 75% - 100% of the tone knob range. I only realized this when I had my amp post setting up near the max while tapping the pu coils to check return.
Once this is corrected I'm going to write up this schematic and send it Barry's way for inclusion on our archive section. Nobody should go thru this again.
Iceman- Hero, Legend, and all round good guy
- Number of posts : 2894
Age : 61
Location : Up North
Registration date : 2011-02-22 -
Re: ...and the Genesis I that became a project as well.
![]() by Westbone Sat May 07, 2011 5:15 pm
by Westbone Sat May 07, 2011 5:15 pm
I've sent you a PM
Westbone- Financial supporter
- Number of posts : 5918
Location : Redbridge
Registration date : 2008-12-28 -
Re: ...and the Genesis I that became a project as well.
![]() by Barry Sat May 07, 2011 7:21 pm
by Barry Sat May 07, 2011 7:21 pm

_________________
"A little song. A little dance. A little seltzer down your pants." -Chuckles the Clown

GUITARS : https://legend.barryeames.com
MUSIC/PIX/VIDEOS: https://getback.barryeames.com (including Spectrum ST)

Barry- Hero, Legend, and all round good guy
- Number of posts : 8773
Age : 79
Location : Port Weller, St. Catharines, Canada
Registration date : 2009-05-01 -
» Another possible project...maybe
» Should this be my next project?
» hee hee; I have a new project...
» We really need to shut up about Westone now...
